DIY - Melt and Pour Soap

Truthfully, as often as I passed the soap and candle making supplies while making a beeline towards Hobby Lobby's polymer clay selections, it never really registered.
What started me on this road is better addressed in my next post (bath bombs). But the more I researched my second idea (the body scrub) the more I found that I wanted to experiment with for this series.
That doesn't mean I won't come back later in the year with more DIY beauty recipe experiments, but as I type this I'm nearing the end of this series.
Research into the body scrubs lead me to the body scrub cubes that use the glycerin to solidify the scrub (which for me had mixed results).
That naturally lead to the melt and pour glycerin soap. I went through so many pages on www.soapqueen.com looking for inspiration until I found the swirled cubes.
How difficult can it be?
Right?
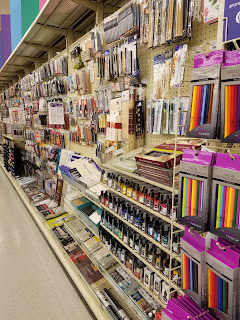
I found my 2lb block of clear glycern soap at Hobby Lobby. Disappointingly the other craft store didn't have anything in store.
There was the clear and the white glycerin soap. Goat Milk. Lavender. Olive oil. So many types.
Then the fragrances... easily 20 different kinds. As you, the readers, already know I only bought vanilla and lavender, but I definitely eyed the cherry blossom scent.
And that was just the soap fragrances. That didn't count the essential oils. The lavender and orange pieces. Dried rose petals. The various colors.
Needless to say I was overwhelmed as I stalked the soap making section.
Granted I was stalking it for the bath bomb supplies, but that's another post for Wednesday.
But my hesitation paid off as the melt and pour soap blocks went on sale.
It's really easy to use. Today I even used a butter knife to cut through this block!
I cut off 4 rows of 4 blocks, cut into small pieces, and dropped each row into a microwave safe cup.


You can also use a double boiler method if using larger amounts of melt and pour.
The package instructions said to melt for 40 seconds, stir, *heat for 10, stir, and repeat from * until smooth.
In the melted mixture add fragrance (a few drops) and any coloring. You can even add cosmetic grade glitter.**
** Cosmetic grade glitter is not make from plastic like craft glitter. DO NOT use craft glitter. It will not dissolve. It will scratch you and potentially cause significant injury if, for example, it gets in your eye. **
Mix well.
In theory to create a swirly soap design, do not use ice cube trays like I did. Also, your soap doesn't need to cool down too much. It'll layer up otherwise.
Pour into your molds in different places (see the SoapQueen tutorial -> faux-swirl-melt-and-pour-cubes here for a better explanation) to create the effect.

Let set to (according to package instructions - for 20-40 minutes.
As soon as they have set you can remove them from the molds. (An ice cube tray involves a butter knife.)

Then use and enjoy.
If, like me, you use more body wash then anything, you'll be used to more bubbles. Also, the PH levels will be different as the glycerin soap has a different formula than body wash or store bought soaps. This means your skin will feel different while using.
But it definitely is nice making a soap in the fragrance that I've been looking for in the stores with no luck.

Alicia


Comments
Post a Comment