Polka Dotted Dress
I started off looking for a pattern for a convertible dress. I had seen the idea on Target and had instantly started to Google search for a pattern. It looked easy and I did not see any reason to spend nearly 40 dollars on a dress that I could, possibly, make for cheaper.
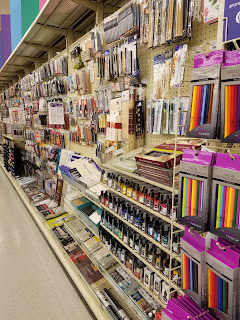
Anybody that knows me should know that my second favorite store (behind any and all bookstores) is Hobby Lobby. Off to Hobby Lobby I went, looking for a pattern for a circle skirt, and they were having a sale: McCalls patterns for $0.99 with a max of ten patterns. I bought 2.
Then it was material time. I wanted red, blue, or purple for my convertible dress. However, this is where the problem comes in...there was not enough knit material (what the pattern called for) in the blue. Everything else was gray, black, and brown, and I had plenty of dresses in black and gray. But there was also this cute black with white polka dots knit material. It would not work for the convertible dress but it would work for the other pattern...Even the model was wearing that material for her dress.
Only I decided to have a blue band instead.
Now, this dress pattern is the dress that has been alluding me for years. You can see it everybody. Even Old Navy and PaylessShoes have the dress in recent commercials. But have I been able to find it? No. Maybe, since it was in an Old Navy add the dress is coming soon, but...in the meantime I have one that I have made.
This was not an easy decision to make. It involved 5 yards of material and a sewing machine. So I used my mom's (she even helped some.)
Now this machine is really old. It's older than me.
So, anyway, the first thing is cutting out the pattern. Most patterns have several designs and sizes. Pick the design you want to create, and pick a size that is two sizes larger than you normally wear when it comes to clothes. You can always take something in but you can't let material out if it was made too small.
Now, all patterns come with instructions. You use the instructions to find out which pieces you will need to cut out. Keep the other pieces if you ever want to create that pattern later. I knew that I would not so I threw the pieces away.

 Having all of the pieces already cut out will make it easier when it is time to pin the pattern to the material.
 No, the rotary cutter will not cut it. You will actually have to use a real pair of scissors. I was informed that a rotary cutter was for straight lines only. Not that I used them for the straight lines... :(
Now, we did things a little backwards. We put together the skirt, then the bodice, then the banding, and the started from start to bottom in putting everything together. And every single time something was sewn together things were pressed with the ironing board. Patterns will give you indications on what to attach where (the notches) and where to create pleats and darts (surprisingly easy). However, if you don't have somebody with you who understands patterns to help (I did: my mom), I don't advise it, unless you can figure things out on your own. I know I won't be much help.
I think the bodice front (the picture right above this one) was harder to put together because it has darts and pleats.
Ironing after every move also helps things lay flatter and it helps with later sewing.
However, after a night of cutting out patterns and pieces, a day of putting things together, and a couple of hours of adjustments and hems...the final product...
The Back
 Showing off the circle skirt
The full effect 

 And just because I love these pictures that Megan took. I call them, Alicia in Cyrus Grove Land. However, I could not get Megan to "follow me down the rabbit hole." It was too wet. But I went wearing heels!
Just for the record, there is a pond on the other side of the trail.


Comments
Post a Comment