DIY Shirt How To - Screen Printing and Heat Transfer Vinyl
In your head you have this amazing shirt design idea. Or you keep looking for a shirt you love, but either can't find what you are looking for or it isn't exactly what you want. Maybe the font is wrong or something. And you can't help but thinking... I want to try to design and make my own shirt.
If anybody is considering making their own shirts and not using drop shippers, this post might be for you.
First off you'll need the Supplies:
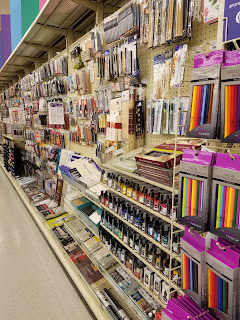
- Shirts. Obviously. Some places you can find blank shirts for as little as $2 (closer to $3-5 in most places, or you can get them on sale. Joann's seems to have periods of time where you can get 3 for $9, 4 for $10, or even 5 for $10! Hobby Lobby sells for around $4 each. I've even seen them at Walmart for $2 (sizes and colors are extremely limited)! I can't tell you Michael's prices - the nearest store is over an hour away.
- Your preferred method of designing the shirts. Do you want to screen print? Use a Cricut or Silhouette as a vinyl cutting machine?
This step can get costly. The vinyl cutting machines can be anywhere from $250 and up for a current model. Both brands have different design set ups. Do your research first. The ease of use of the Cricut was why I picked it - that and the price. The machine was on sale when I bought it.
However, if I'd know just how much trouble I'd have with the design studio and Adobe Flash... That's really my only complaint.
Also, keep in mind that both Cricut and Silhouette Brand supplies cannot be combined with a store discount coupon. Yes, the machines and vinyl and weeding tools and everything else will go on sale, but no coupons.
As for screen printing kits. Speedball seems to be the most popular brand. Get the starter kit - It has everything you will need. Remember your craft store coupon! While not as costly as a Cricut, the screen print technique can be complicated and time consuming. Until you get the hang of it avoid small and fiddly font lines. (Further explanation to come.)
*Alternative - Stencils
- If you use a Cricut or Silhouette you'll need vinyl. For shirts it's heat transfer vinyl. I prefer Siser Easy Weed vinyl over any other brands. Easier to remove the extra vinyl. Easier to apply. The vinyl seems to last longer on the shirt than other brands. It can be ordered online and some of the non-'mainstream' craft stores might carry it. I lucked out by discovering it at one of the local fabric and sews stores. (Along with Oracal 631 - and indoor vinyl which has an outdoor test of 3 years. 651 is mostly used for outdoor applications and has a 6 year test, but I order that online.) ExpressionsVinyl.com is a good place to order from.
- If you are using a screen print method or stencils - fabric paint. The not puffy paint. You can find it in the fabric decorating aisle, but it's in containers like regular acrylic paint. (Do Not Use Acrylic Paint!) Also either nearly translucent vellum or clear transparency sheets.
The Process - For Screenprinting
First off, PREP YOUR SCREEN. Seriously. Do this first before you even start designing the shirt. Why? This part can take hours. Literally hours. In a dark room with very little light you'll be painting your screen, front and back with an emulsion (complete directions will be with the starter kit) and it'll be left to dry in a dark place. This can get messy. I found a box big enough to put the screen in to completely keep it in the dark and stuck push pins in the bottom of my screen to keep the screen off of the box and help air circulation. I also did this because I would be moving the screen from one room to another room. I wasn't about to get green emulsion on my carpet!
After you've gotten your screen read go and design the shirt. Maybe go into Microsoft Word and play with fonts, clip art, and inserting photos. Go into a design studio. (Anybody else remember playing in Paint on your computer?) For beginners, start simple. Remember, nothing small and fiddly. Print off your design on the clear transparency (on the grainy side - the ink won't hold on the smooth side) or on the vellum.
Get your light reflector set up. I used a lamp with an aluminum baking tin. The kind you would roast a turkey or ham in. It took some work to get the tin angled and secured to the top of the lamp - to reflect the light back on the screen. If you already have a light reflector that would work better.
Check your screen. Is it dry? Great! It should still be green. No, wait until it dries. This can take 1 to 3 hours.
Screen dry? Keep it covered when you take it to your light reflector. Keep the light off so you can get everything positioned and secured to the screen so it doesn't move. This means turning the design upside down. Once the image has formed on the screen it'll be exactly the way it needs to be. Once it's positioned, turn the light on and wait anywhere from 30 to 45 minutes. Check your screen after 30 and if the green had turned a grayish green you are good to go. If not, wait a bit longer.
Turn off the light. Remove the screen, and wash out the unprocessed emulsion (it'll still be green). Clear it all out. Out of every line. Until you get better it, I'd still advise to avoid tiny lines.
Dry the screen.
Place you shirt on a flat surface with cardboard in the middle to keep the paint from seeping to the other side.
Place your screen in position on your shirt. Apply the fabric paint at the top of the screen and using your scraper tool move the paint downward - with some pressure - over the exposed part of the screen. Push it back up. You should only do this a few times. Too many and the paint will be pressed too deeply into the shirt.
Remove screen. Let dry. Iron to set with a paper towel over the screen print. Wash cold with the shirt inside out.
Done!
The Process - Stencil Method
Place your shirt with cardboard in the middle to keep paint for seeping to the other side.
Place your stencil. Dab fabric paint using a sponge dapper.
Let dry. Iron to set with a paper towel over the paint. Wash cold with the shirt inside out.
Done!
The Process - Die Cutting Machine
Design your shirt in the machine's design studio.
Place the heat transfer vinyl upside down (shiny side touching the sticky mat) on the mat.
Follow the die cut machine's process, loading, etc. Remember, your design needs to be cut in reverse. My Cricut has a small check box to click for iron-on vinyl.
The machine will do all the cutting for you. Once it's done, unload it from the machine and start removing the vinyl you don't want on the shirt. This would be the outside of the letters and the inside of the letters.
Position your shirt on an ironing board. Iron the section you plan on placing your vinyl to assure that it is smooth.
Place your vinyl. I find using the arm pits and the neckline of the shirt as a good guide. Your decal should be centered with some of the lettering above the arm pit line.
At this time the vinyl should be applied with the lettering facing the right way and the plastic protective sheeting on top. If the clear sheeting is on top and the letters are backwards, you'll need to cut it again and make certain to click the appropriate boxes.
Cover the vinyl sheeting with a paper towel or thin cloth. Iron, holding in place for 15-30 seconds. Carefully peel away the clear sheet - if the vinyl tries to pull away, iron some more.
DO NOT place the hot iron on the clear sheeting. The sheeting will melt. The vinyl will melt. Your decal will be ruined. Yes, I know this from experience.
Machine wash inside out. Do not iron the decal.
Alternative Method
Buy that shirt.
Huh?
Buy that shirt. The above processes can cost anywhere from $15 to over $300 and if you are only planning one shirt then that is one very expensive shirt. If you are planning on more than one shirt that's another story.
Ask one of the many shirt people on Etsy about a custom order. Some of the people working with heat transfer vinyl should be able to easily accommodate your request. Keep in mind, not everybody will, but it never hurts to ask. That's $15-$25 dollars (plus S&H) and if you aren't a DIYer than it is always a good alternative. Just remember to respond to the person you ultimately buy it from - often they will send mock ups for final approval.
What's your shirt DIY suggestions? Did I miss one? Comment below.
Alicia
If anybody is considering making their own shirts and not using drop shippers, this post might be for you.
First off you'll need the Supplies:
- Shirts. Obviously. Some places you can find blank shirts for as little as $2 (closer to $3-5 in most places, or you can get them on sale. Joann's seems to have periods of time where you can get 3 for $9, 4 for $10, or even 5 for $10! Hobby Lobby sells for around $4 each. I've even seen them at Walmart for $2 (sizes and colors are extremely limited)! I can't tell you Michael's prices - the nearest store is over an hour away.
- Your preferred method of designing the shirts. Do you want to screen print? Use a Cricut or Silhouette as a vinyl cutting machine?
This step can get costly. The vinyl cutting machines can be anywhere from $250 and up for a current model. Both brands have different design set ups. Do your research first. The ease of use of the Cricut was why I picked it - that and the price. The machine was on sale when I bought it.
However, if I'd know just how much trouble I'd have with the design studio and Adobe Flash... That's really my only complaint.
Also, keep in mind that both Cricut and Silhouette Brand supplies cannot be combined with a store discount coupon. Yes, the machines and vinyl and weeding tools and everything else will go on sale, but no coupons.
As for screen printing kits. Speedball seems to be the most popular brand. Get the starter kit - It has everything you will need. Remember your craft store coupon! While not as costly as a Cricut, the screen print technique can be complicated and time consuming. Until you get the hang of it avoid small and fiddly font lines. (Further explanation to come.)
*Alternative - Stencils
- If you use a Cricut or Silhouette you'll need vinyl. For shirts it's heat transfer vinyl. I prefer Siser Easy Weed vinyl over any other brands. Easier to remove the extra vinyl. Easier to apply. The vinyl seems to last longer on the shirt than other brands. It can be ordered online and some of the non-'mainstream' craft stores might carry it. I lucked out by discovering it at one of the local fabric and sews stores. (Along with Oracal 631 - and indoor vinyl which has an outdoor test of 3 years. 651 is mostly used for outdoor applications and has a 6 year test, but I order that online.) ExpressionsVinyl.com is a good place to order from.
- If you are using a screen print method or stencils - fabric paint. The not puffy paint. You can find it in the fabric decorating aisle, but it's in containers like regular acrylic paint. (Do Not Use Acrylic Paint!) Also either nearly translucent vellum or clear transparency sheets.
The Process - For Screenprinting
First off, PREP YOUR SCREEN. Seriously. Do this first before you even start designing the shirt. Why? This part can take hours. Literally hours. In a dark room with very little light you'll be painting your screen, front and back with an emulsion (complete directions will be with the starter kit) and it'll be left to dry in a dark place. This can get messy. I found a box big enough to put the screen in to completely keep it in the dark and stuck push pins in the bottom of my screen to keep the screen off of the box and help air circulation. I also did this because I would be moving the screen from one room to another room. I wasn't about to get green emulsion on my carpet!
After you've gotten your screen read go and design the shirt. Maybe go into Microsoft Word and play with fonts, clip art, and inserting photos. Go into a design studio. (Anybody else remember playing in Paint on your computer?) For beginners, start simple. Remember, nothing small and fiddly. Print off your design on the clear transparency (on the grainy side - the ink won't hold on the smooth side) or on the vellum.
Get your light reflector set up. I used a lamp with an aluminum baking tin. The kind you would roast a turkey or ham in. It took some work to get the tin angled and secured to the top of the lamp - to reflect the light back on the screen. If you already have a light reflector that would work better.
Check your screen. Is it dry? Great! It should still be green. No, wait until it dries. This can take 1 to 3 hours.
Screen dry? Keep it covered when you take it to your light reflector. Keep the light off so you can get everything positioned and secured to the screen so it doesn't move. This means turning the design upside down. Once the image has formed on the screen it'll be exactly the way it needs to be. Once it's positioned, turn the light on and wait anywhere from 30 to 45 minutes. Check your screen after 30 and if the green had turned a grayish green you are good to go. If not, wait a bit longer.
Turn off the light. Remove the screen, and wash out the unprocessed emulsion (it'll still be green). Clear it all out. Out of every line. Until you get better it, I'd still advise to avoid tiny lines.
Dry the screen.
Place you shirt on a flat surface with cardboard in the middle to keep the paint from seeping to the other side.
Place your screen in position on your shirt. Apply the fabric paint at the top of the screen and using your scraper tool move the paint downward - with some pressure - over the exposed part of the screen. Push it back up. You should only do this a few times. Too many and the paint will be pressed too deeply into the shirt.
Remove screen. Let dry. Iron to set with a paper towel over the screen print. Wash cold with the shirt inside out.
Done!
The Process - Stencil Method
Place your shirt with cardboard in the middle to keep paint for seeping to the other side.
Place your stencil. Dab fabric paint using a sponge dapper.
Let dry. Iron to set with a paper towel over the paint. Wash cold with the shirt inside out.
Done!
The Process - Die Cutting Machine
Design your shirt in the machine's design studio.
Place the heat transfer vinyl upside down (shiny side touching the sticky mat) on the mat.
Follow the die cut machine's process, loading, etc. Remember, your design needs to be cut in reverse. My Cricut has a small check box to click for iron-on vinyl.
The machine will do all the cutting for you. Once it's done, unload it from the machine and start removing the vinyl you don't want on the shirt. This would be the outside of the letters and the inside of the letters.
Position your shirt on an ironing board. Iron the section you plan on placing your vinyl to assure that it is smooth.
Place your vinyl. I find using the arm pits and the neckline of the shirt as a good guide. Your decal should be centered with some of the lettering above the arm pit line.
At this time the vinyl should be applied with the lettering facing the right way and the plastic protective sheeting on top. If the clear sheeting is on top and the letters are backwards, you'll need to cut it again and make certain to click the appropriate boxes.
Cover the vinyl sheeting with a paper towel or thin cloth. Iron, holding in place for 15-30 seconds. Carefully peel away the clear sheet - if the vinyl tries to pull away, iron some more.
DO NOT place the hot iron on the clear sheeting. The sheeting will melt. The vinyl will melt. Your decal will be ruined. Yes, I know this from experience.
Machine wash inside out. Do not iron the decal.
Alternative Method
Buy that shirt.
Huh?
Buy that shirt. The above processes can cost anywhere from $15 to over $300 and if you are only planning one shirt then that is one very expensive shirt. If you are planning on more than one shirt that's another story.
Ask one of the many shirt people on Etsy about a custom order. Some of the people working with heat transfer vinyl should be able to easily accommodate your request. Keep in mind, not everybody will, but it never hurts to ask. That's $15-$25 dollars (plus S&H) and if you aren't a DIYer than it is always a good alternative. Just remember to respond to the person you ultimately buy it from - often they will send mock ups for final approval.
What's your shirt DIY suggestions? Did I miss one? Comment below.
Alicia

Comments
Post a Comment