Playing with Paint
To be exact, I was playing with blackboard paint, one of those assemble it yourself side tables from Walmart. (Round top, screw on legs, can put a glass over it? Ring any bells?)
 I had had this table forever and with recently having to move back in with my parents it was currently resting, unassembled, in a closet. At least the legs are in a closet, the table top was in the garage. There it was, innocently waiting for me to be able to move back out and add it wherever my future abode is located. It was whispering, "Use me!"
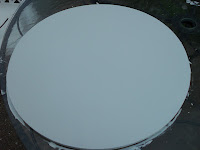
Instead it was painted white.
 Then I made a masking tape outline of where I want the blackboard square center to go.
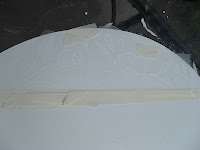
Then it was stenciled over. Remember to tap down your stencils!
 Here's the thing with stencils: they are meant to be used with sponges. Not paint brushes. But I will admit that I love the effect that the bleeding of the paint created.
 Then I painted used the blackboard paint that I had found, also at Walmart despite the several craft posts I have found on Pinterest about how to make blackboard chalk in other colors.
Regardless, using the paint is simple. You paint a thin coat on the surface. Let it dry for an hour. Paint a thicker coat of paint over that and let it cure for 24 hours. At this point you are done painting and can remove the tape.
As you can tell, this is the last photo I have and the project is not finished. When I removed the tape some of the stenciled design came off. I'm planning on painting on a border when I decide on the color.
Once the 24 hours are you condition the paint by rubbing chalk over it, which I have, admittedly, not yet done and it's been about 2 weeks since I have done this. Yes. I know. I'm slacking. But I'm also on a sewing kick so there is a few other posts that are waiting to be photographed and 'published' for your viewing pleasure.
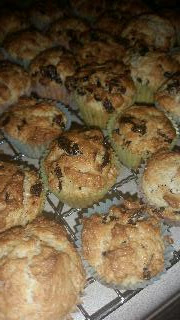
I also want to update something. On a whim I put an Oreo on the bottom of my brownies...inspired by Knuckle Salad. I love her blog. Go over and read it. I'll see if I can post a link to her and a few other blogs I follow in the sidebar. ~>


Anyway, the cookie came out a little hard but that's probably because brownies can take a little longer to cook than cupcakes.
And now, back to the fabrics.
 I had had this table forever and with recently having to move back in with my parents it was currently resting, unassembled, in a closet. At least the legs are in a closet, the table top was in the garage. There it was, innocently waiting for me to be able to move back out and add it wherever my future abode is located. It was whispering, "Use me!"
Instead it was painted white.

 Then I made a masking tape outline of where I want the blackboard square center to go.
Then it was stenciled over. Remember to tap down your stencils!
 Here's the thing with stencils: they are meant to be used with sponges. Not paint brushes. But I will admit that I love the effect that the bleeding of the paint created.
  Then I painted used the blackboard paint that I had found, also at Walmart despite the several craft posts I have found on Pinterest about how to make blackboard chalk in other colors.
 Regardless, using the paint is simple. You paint a thin coat on the surface. Let it dry for an hour. Paint a thicker coat of paint over that and let it cure for 24 hours. At this point you are done painting and can remove the tape.
As you can tell, this is the last photo I have and the project is not finished. When I removed the tape some of the stenciled design came off. I'm planning on painting on a border when I decide on the color.
Once the 24 hours are you condition the paint by rubbing chalk over it, which I have, admittedly, not yet done and it's been about 2 weeks since I have done this. Yes. I know. I'm slacking. But I'm also on a sewing kick so there is a few other posts that are waiting to be photographed and 'published' for your viewing pleasure.
I also want to update something. On a whim I put an Oreo on the bottom of my brownies...inspired by Knuckle Salad. I love her blog. Go over and read it. I'll see if I can post a link to her and a few other blogs I follow in the sidebar. ~>


Anyway, the cookie came out a little hard but that's probably because brownies can take a little longer to cook than cupcakes.
And now, back to the fabrics.

Comments
Post a Comment