Macarons
I became obsessed with macarons a few months ago. They were everywhere. Facebook. Instagram. Food shows. Macarons. Macarons. Macarons.
But...there isn't a single bakery that I'm aware of in my area that makes them.
Back in June when I went to Houston, Texas to visit my friend, I knew that this was a chance to fulfill this bucket list item.
It took me a while to bring up my request and my friend thought I was crazy for spending over $20 on 12 small macarons. But it was on my bucket list and it's not often that I have enough money to splurge like that.
Yummmmm
Enough said.
But...for the past couple of weeks I've been wanting to try some more. Only this time I decided I'd make them. Easy enough...I have a decent amount of baking skills.
So I went macaron recipe hunting.
That's where my adventure begins.
Step one - find the ingredients.
Almond flour. Okay. Easy enough...not.
My saving grace came with my local Kroger's new gluten-free area. If Kroger had not expanded then this recipe would have been over before it started.
Apparently you cannot use regular grain flour types. This is a gluten-free cookie.
Step 2 - get a rubber spatula.
Recipe from: Oh Sweet Day
Ingredients
3/4 cup almond flour
1 cup confectioners sugar
2 large egg whites
1/4 cup granulated sugar
1 cup confectioners sugar
2 large egg whites
1/4 cup granulated sugar
Gel food coloring - not liquid
Directions
1. Shift together the almond flour and confectioners sugar. Shift it 2-3 times. If using almond meal instead of flour grate in food processor with confectioners sugar before shifting.
2. With the egg whites (no yokes) in a separate bowl, whip on high with a whip, electric beaters, or stand mixing bowl w/ whip attachment...until frothy. One blog said it should look like a bubble bath.
3. Slowly add sugar to egg mixture. Continue beating on high until egg mixture forms soft peaks. About 5 minutes.
I really wished my KitchenAide had a whip attachment right about then.
4. Using the rubber spatula, slowly fold in almond flour mixture into the egg mixture. Add about a third of the mixture at a time until mixed together.
5. Once it is all mixed together add food coloring. Mix until batter falls from spatula in wide ribbons.
6. Put mixture into a icing bag, or a ziplock bag in a pinch. You'll need a 1/2 inch round tip if you use the icing back. I used a cookie press with the tips off (the lack of tip left a round circle sized hole where the tips screw in at).
7. Preheat oven to 325F. You might do this after you've measured out the macarons -- next step.
8. Pipe the batter about an inch apart, forming 1/2 inch circles on the paper. They will spread a little. Once finished lightly tap the pan against the counter to remove any air bubbles. Let sit 30 minutes to an hour.
9. In the preheated to 325F oven, bake the cookies for 10-12 minutes, until they have set but not browned.
10. Transfer to cooling racks while still on the cooling racks. You can set the baking sheet on the racks. Let them cool completely. If the cookies don't remove easily, bake for another minute or two.
11. Turn half of them upside down. Spoon or pipe filling on each cookie that is upside down. Top with remaining cookies.
This part is tricky. Some sites say you can eat them immediately. Some say to wait 24 hours.
Either way, they can be chilled in the refrigerator for 3 days. You can also find other recipes and suggestions about flavoring and fillings from other sites.
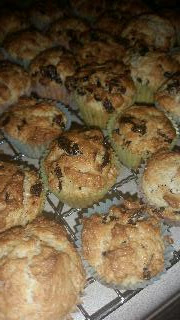
These cookies are difficult. They take practice. I haven't made a perfect macaron yet. Doesn't mean I won't stop trying.
Now I really want to make some more.

Comments
Post a Comment