A Beginner's Guide to Metal Stamping
For a few months I've been going metal stamp crazy.
When I first attempted it I did everything wrong it felt like.
Wrong hammer. My letters were all screwy or not imprinted enough. The ink wouldn't set.
So, if you decide to get into the expensive habit of metal stamping here's some things you need to know.
1. Start off with soft - I use aluminum - metal blanks to start off. The craft stores seem to have them now.
2. Supplies - A decent hammer, a steel block, metal stamps, stamping blanks. Some stamps need a hole puncher and some already come with a hole in the top.
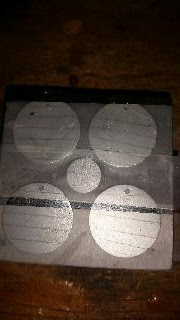
3. Figure out the best way to line up what you are going to stamp in the disc. There is lining tape that you can buy. I use a ruler, graph paper, and a pencil. Lining the disc up on the paper, I use the pencil and clear ruler to line up on the graph paper and make lines.
4. Secure your blank. I like clear tape because I can see my pencil lines. Don't layer too much tape because it can lessen the indent from where you stamp.
5. Have you stamps ready and in order. Check them before you use them. Out-of-sequence stamps or sideways stamps can easily mess up your project.
6. Don't get too close to the hammer. Hold the stamp securely. If you tend to smash your fingers with a hammer do not attempt.
7. Remove tape. Make sure to get all the tape off, including where it might have been punched out.
8. The best ink I've found is a pantina. It won't always stay when you prep it, but that's based on your stamps' indentations. Smear. Paint. Cover completely. Let set for a moment then start wiping off with Q-tips or cotton balls. This is a messy process. Have rubbing alcohol nearby. Once most of the ink is off dip a Q-tip in rubbing alcohol and finish cleaning up the discs.
9. Use warm water, soap, and germ-x (or rubbing alcohol) to clean your fingers.
You can use your stamped discs on necklaces, bracelets, or as an insert in those clear lockets.
If you attempt this, best of luck.
A


Comments
Post a Comment